

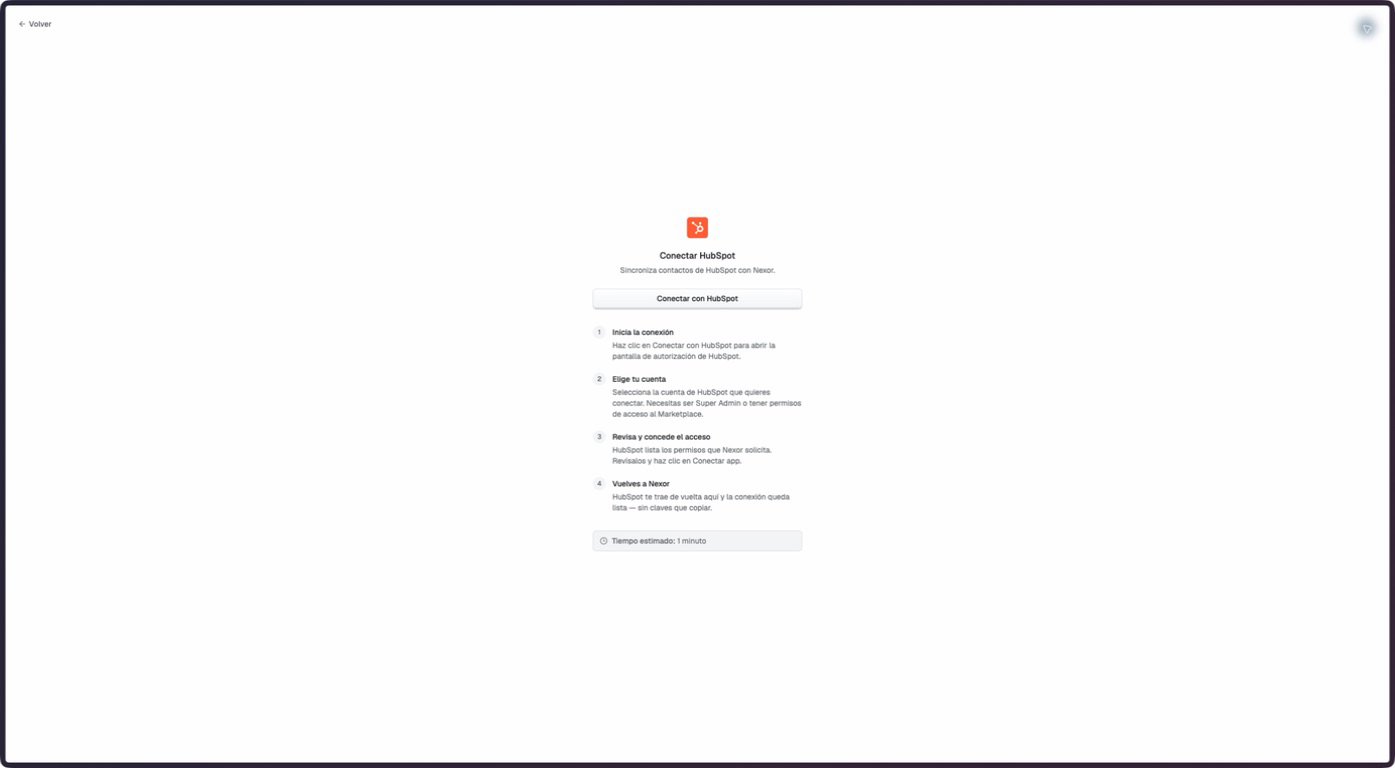
HubSpot connection screen observed in staging on September 7, 2026. The staging interface was displayed in Spanish.
The staging documentation account was not connected to a HubSpot portal. This walkthrough confirms the connection screen only. The connected Inputs, Outputs, and mapping screens described below were verified against the current product code but could not be captured safely in staging.
Before you connect
You need a HubSpot user who can install apps. This is normally a Super Admin or a user with App Marketplace access. Nexor connects through HubSpot OAuth. You do not create or paste a HubSpot API key into Nexor. During authorization, HubSpot shows the portal and permissions before access is granted.Permissions and data Nexor can access
Authorization asks only for the permissions the integration uses. HubSpot shows them before access is granted, and you can revoke them from HubSpot at any time.
When you turn on Interaction history, Nexor records notes, calls, meetings and WhatsApp attempts as activities associated with the contact.
Within these permissions, you decide the detail: which contacts enter, which properties map to which Nexor fields, which outputs are on and which stages are protected. Nexor does not ask for access to tickets, marketing emails, files, products or quotes. If your use case needs another HubSpot object, talk to your Nexor team to evaluate it.
Connect the portal
1
Open HubSpot in Nexor
Go to Integrations → HubSpot and select Connect with HubSpot.
2
Choose the portal
In HubSpot, select the portal to connect and review the requested permissions.
3
Grant access
Approve the connection in HubSpot. HubSpot returns you to Nexor when authorization is complete.
Configure Inputs
Open Inputs → Input doors → Add input door. Each door defines which HubSpot contacts enter Nexor and, when applicable, which Agent receives them.
For an automatically reviewed list, the available intervals are 30 minutes, 1 hour, 4 hours, 12 hours, 1 day, and 2 days. The list door can be paused without deleting its configuration. Pause when contact leaves list is a separate option and only applies when enabled.
Before importing, open How your data lands and map HubSpot properties to the intended Nexor fields. Review the mapping whenever properties change in HubSpot.
Configure Outputs
Open Outputs to decide what Nexor may write to HubSpot. The current screen groups controls into:- Current data for configured contact data.
- Interaction history, with independent controls for notes, meetings, and calls.
- Stages and statuses for configured lifecycle and status relationships.
- HubSpot tools for actions available to Agents.
Owners and External IDs
An organization member can store their HubSpot External ID under Organization. This creates an identity link that applicable routing and ownership settings can use.An External ID does not, by itself, guarantee that every imported contact is assigned to the matching host. Assignment also depends on the input door or tool that processes the contact.
Deals and advanced configuration
HubSpot tools are configured per Agent under Settings → Tools → Configure for this agent. The integration does not provide a separate deal management screen. Bulk owner mapping is available through the API and MCP tools. Use the MCP Server reference or a Nexor-assisted setup for these advanced controls. Do not follow older instructions that reference a separate HubSpot deals screen.Protected stages
The deal sync, Lead sync, and deal update tools include Protected stages. Select stages from your HubSpot account’s pipelines and save the Agent configuration. No stages are protected by default: each organization chooses which ones to preserve. Before writing, the tool reads the current HubSpot state. If it is protected, the tool preserves both its stage and pipeline, even when the destination is also protected. A record that is not yet protected can still move into a protected stage.- Protection is per Agent, object, and pipeline. Leads and deals have independent settings.
- Both deal tools respect protections configured in either tool while they are active. To remove a protection, deselect it in every active tool where it is selected.
- Other deal data, such as owner or amount, can still be updated without changing the protected stage.
- If the configuration cannot be verified, or the current stage cannot be read when protection is configured, the stage change fails without overwriting the record.
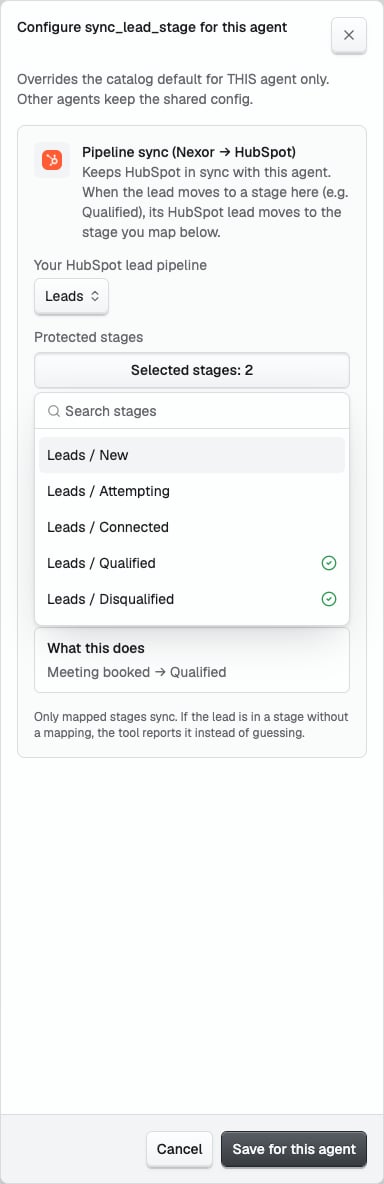
The actual protected stages selector, running locally with example data.
Protection controls writes from these Nexor tools. It does not block human edits or external HubSpot automations, or undo earlier changes. An external edit between the read and write can overlap with synchronization.
Troubleshooting
Imported contacts are not assigned to an Agent
Imported contacts are not assigned to an Agent
Review the Agent selected for the input door. A real-time door can use No agent, which stores the contact without assigning it.
A recurring list has not been reviewed yet
A recurring list has not been reviewed yet
Check that the list door is enabled and compare the last run with its selected interval. The scheduled interval is the visible contract; a real-time refresh is not guaranteed for every list.
Activities have no HubSpot owner
Activities have no HubSpot owner
Confirm that the relevant organization member has the correct HubSpot External ID and that the applicable ownership configuration uses that mapping. Without a resolved HubSpot owner ID, an activity can remain without an owner.