

Before you connect
- Only account Owners and Admins can connect WhatsApp.
- You need a Facebook account. During signup you can create a Meta Business Portfolio and a WhatsApp Business Account (WABA), or use ones you already have. If you already have them, make sure you have:
- access to the right Meta Business Portfolio and WABA, with capacity for another number;
- complete business info in Meta (legal name, address, business phone, and a public HTTPS website);
- no unresolved status, verification, billing, or payment prompts in WhatsApp account settings or WhatsApp phone numbers.
During a free trial
You can’t add or change channels until your subscription starts. When it’s enabled for your trial, WhatsApp shows Shared Nexor WhatsApp line: your agents can contact your leads on WhatsApp from a shared Nexor line, including starting the conversation, with no setup.Start in Nexor
You can start the connection from three places:- From your agent: select the agent, open Channels, and choose Add a channel. If WhatsApp is already listed, open it and choose Connect new.
- From Integrations: open Integrations in the left sidebar, choose WhatsApp, and select Connect WhatsApp, or Add number if you already have one.
- From Nexor AI: ask “Connect WhatsApp to my agent” and follow the link it returns.
Choose how to connect
Nexor offers two options:If your account uses one Nexor number for both WhatsApp and calls, only Connect a phone number is available.
Connect a phone number
Choose Connect a phone number, then continue in Meta’s window. Keep the phone line nearby: Meta sends a code by SMS or phone call.1
Continue
Log in with the Facebook account that manages your business and click Continue.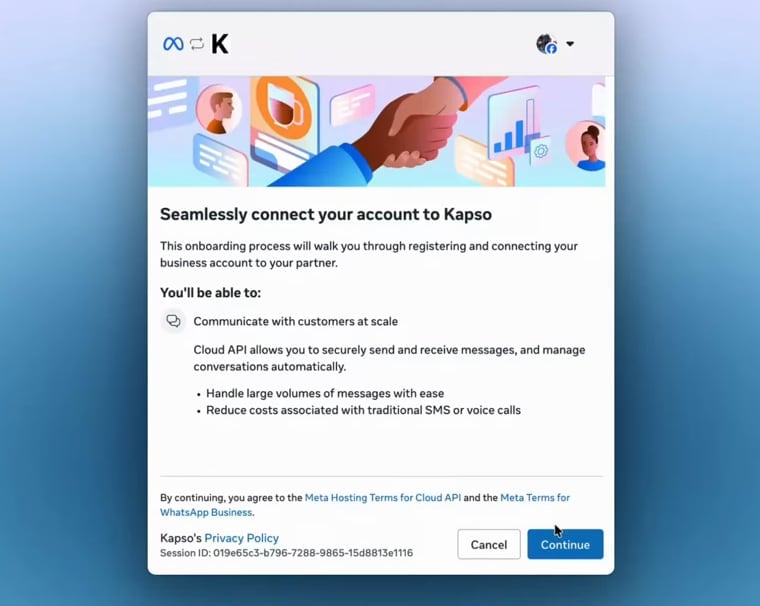
2
Select the business portfolio
Choose the Business portfolio for the business that owns this phone number.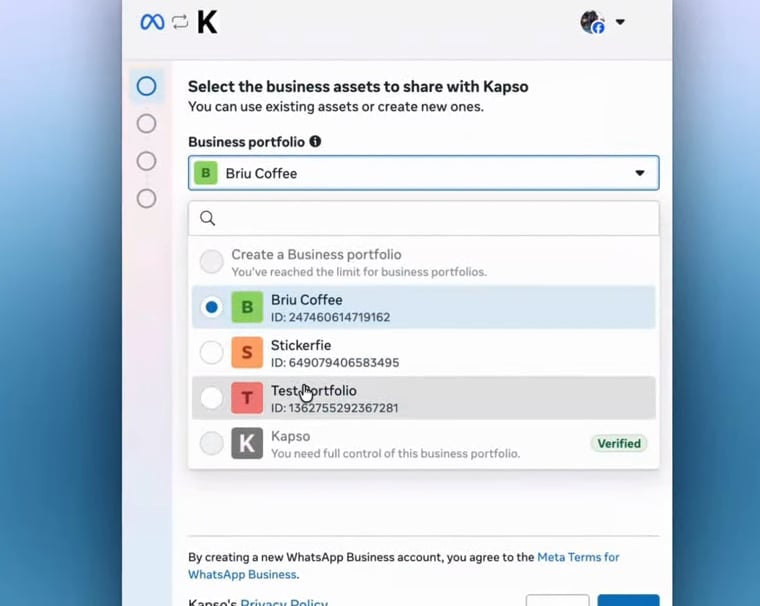
3
Choose a WhatsApp Business account
Choose an existing WhatsApp Business account, or create one if Meta asks you to.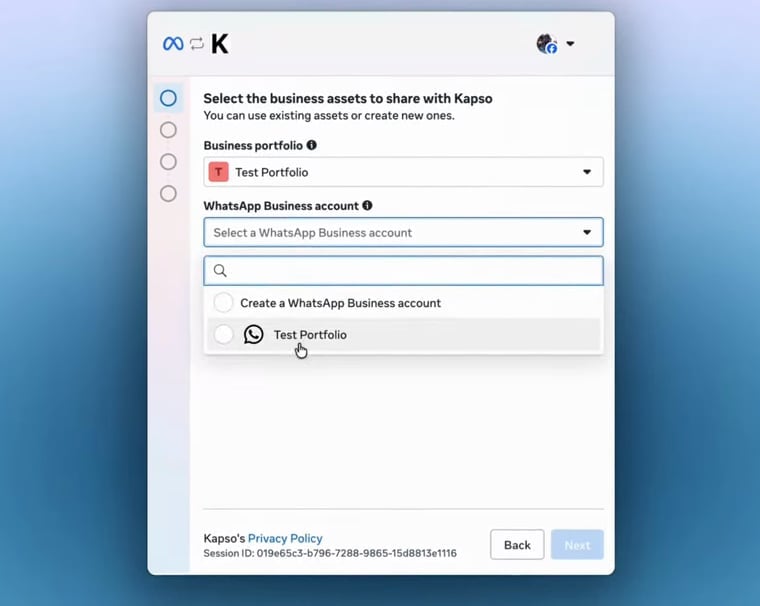
4
Add a new number
On Add your WhatsApp phone number, do not choose Use a display name only. Choose Add a new number.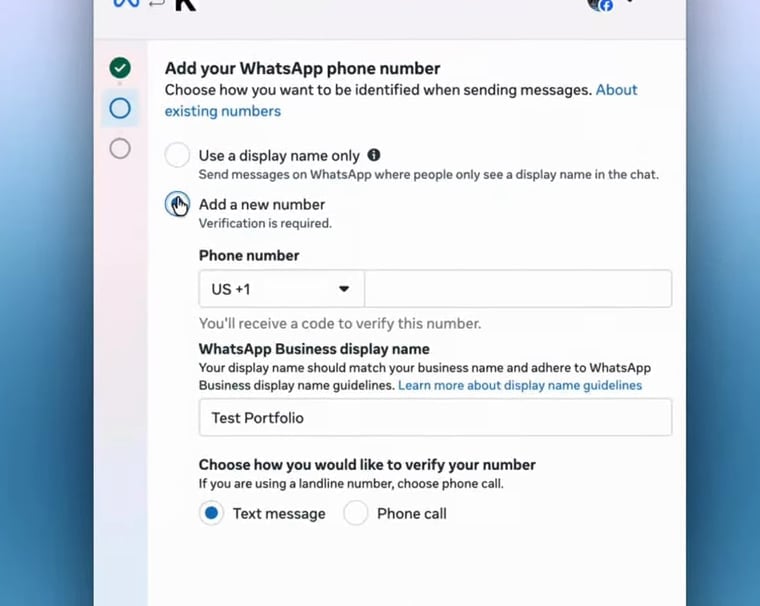
5
Enter the number details
Select the country code, enter the number and a WhatsApp Business display name, pick Text message or Phone call, and click Next.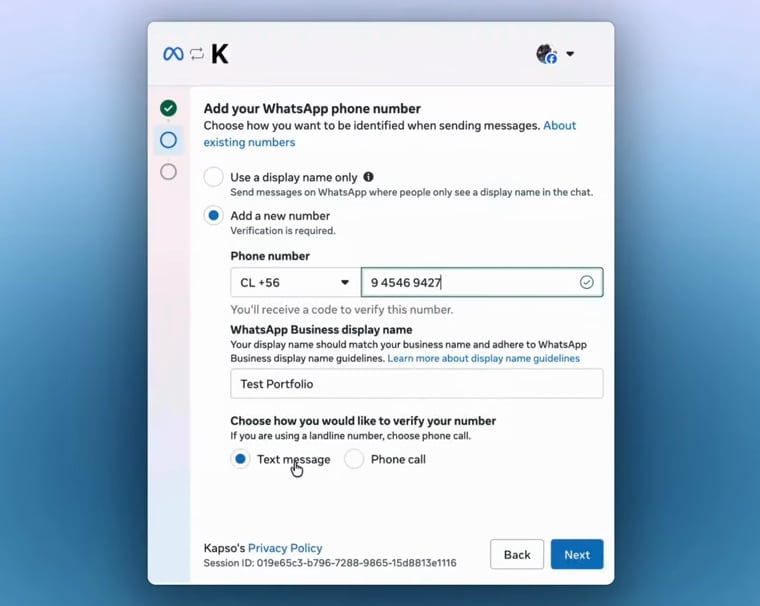
6
Verify the number
Enter the 6-digit verification code from Meta and click Next.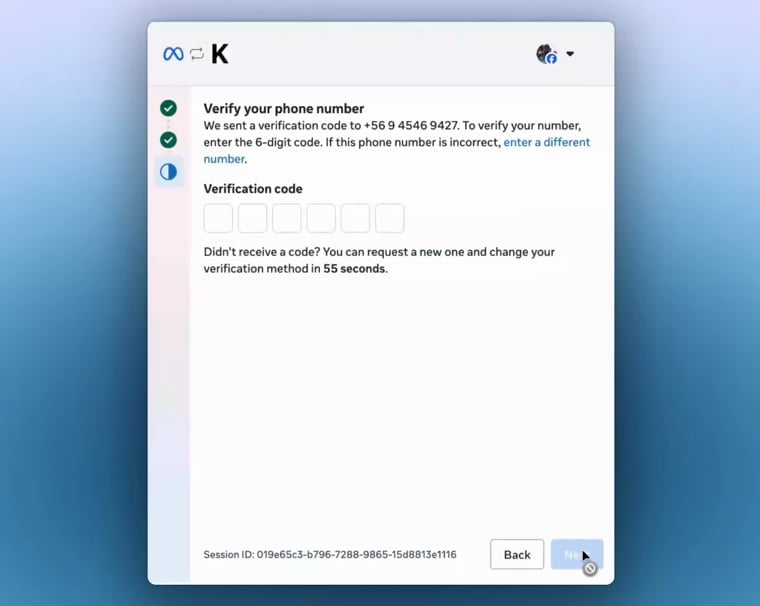
7
Finish
When Meta shows Your account is connected, click Finish to return to Nexor.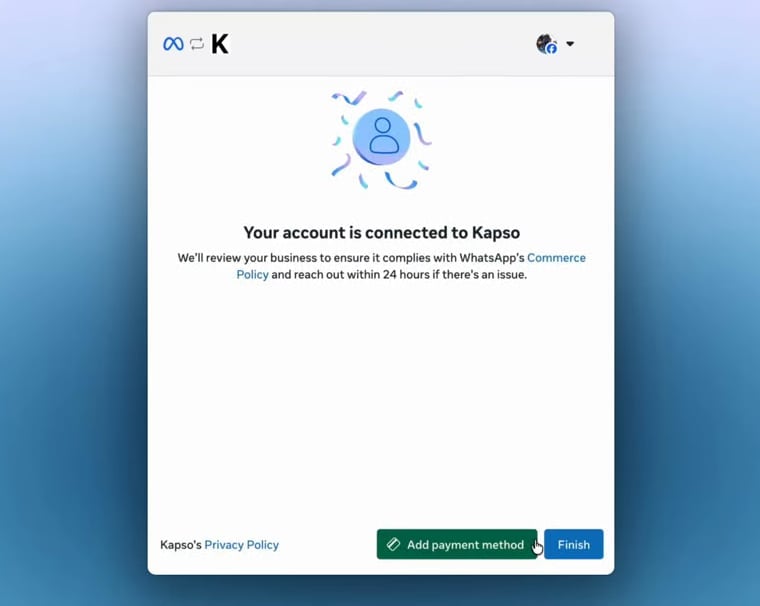
1
Pick a BSP-provided number
Open the Phone number dropdown, select a number under BSP provided number (BSP = Business Solution Provider; the pre-verified number Nexor provides), and click Next.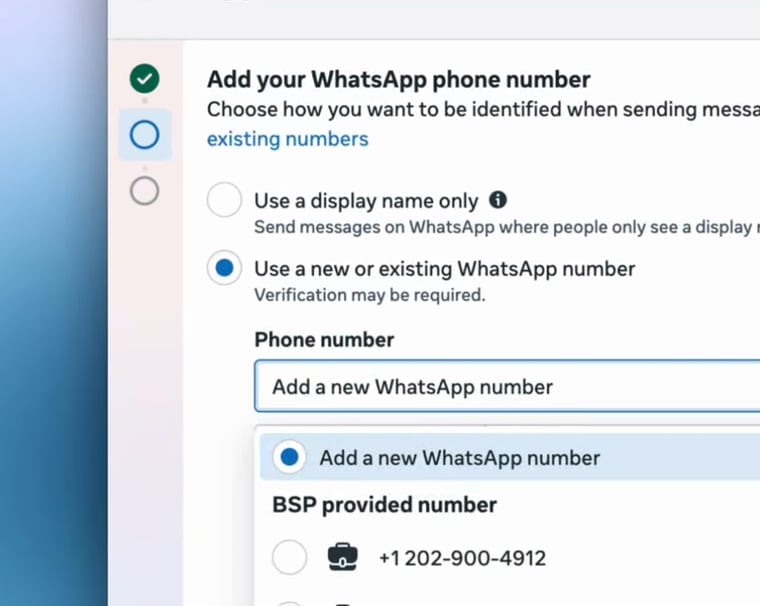
Connect WhatsApp Business
Keep using the WhatsApp Business app alongside Nexor. The number must be active in the WhatsApp Business App (not personal WhatsApp), and you need that phone with a working camera. Choose Connect WhatsApp Business, then continue in Meta’s window.1
Continue
Log in with the Facebook account that manages your business and click Continue.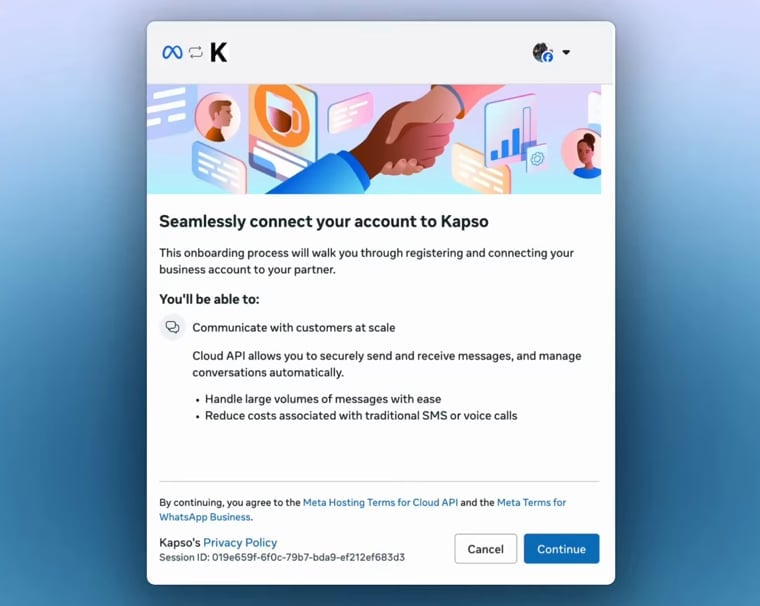
2
Select the business portfolio
Choose the Business portfolio for the business that owns this WhatsApp number.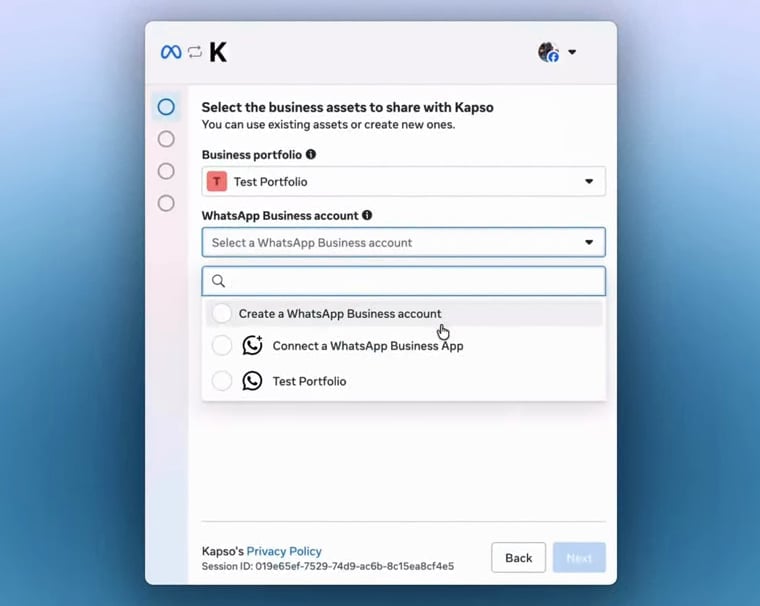
3
Connect a WhatsApp Business App
In WhatsApp Business account, choose Connect a WhatsApp Business App and click Next.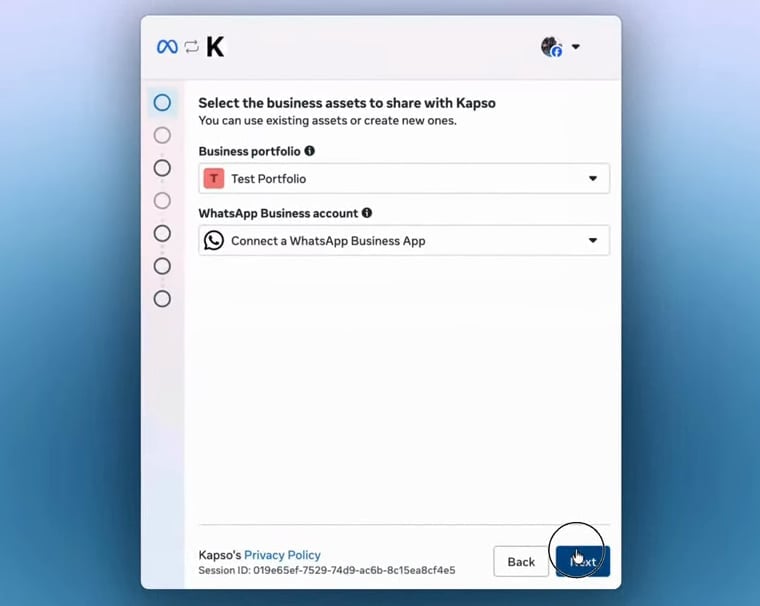
4
Enter your number
Select the country code, enter the number already active in your WhatsApp Business App, and click Next.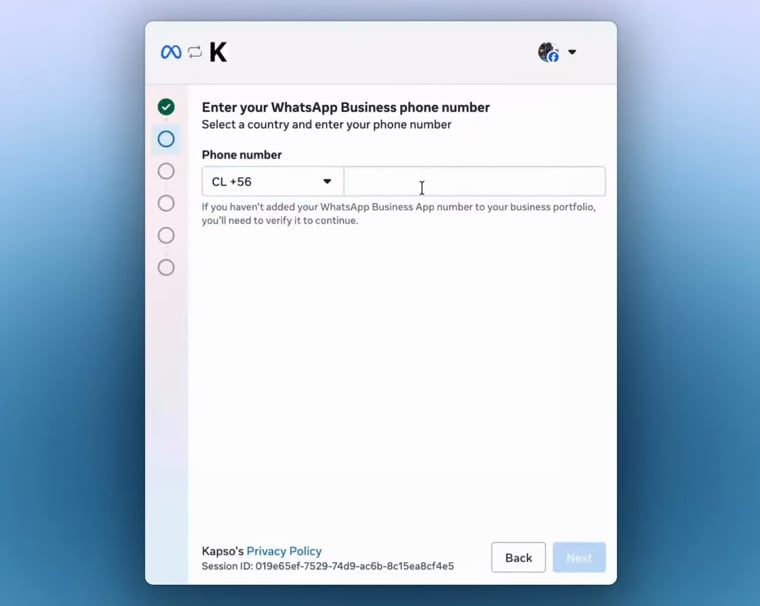
5
Review sharing
On Connect your existing WhatsApp Business App, review the sharing and protection info, then click Next.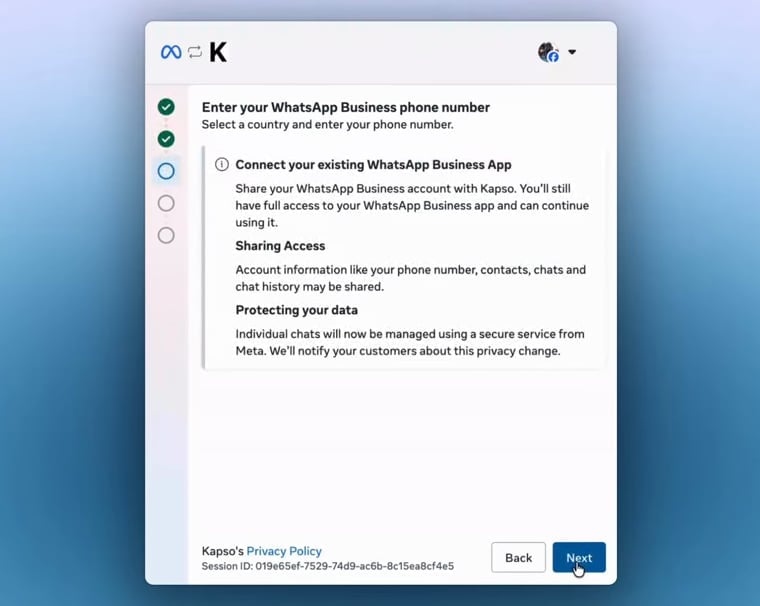
6
Open the app at the QR code
When the QR code appears, keep the browser open and open the WhatsApp Business App on your phone.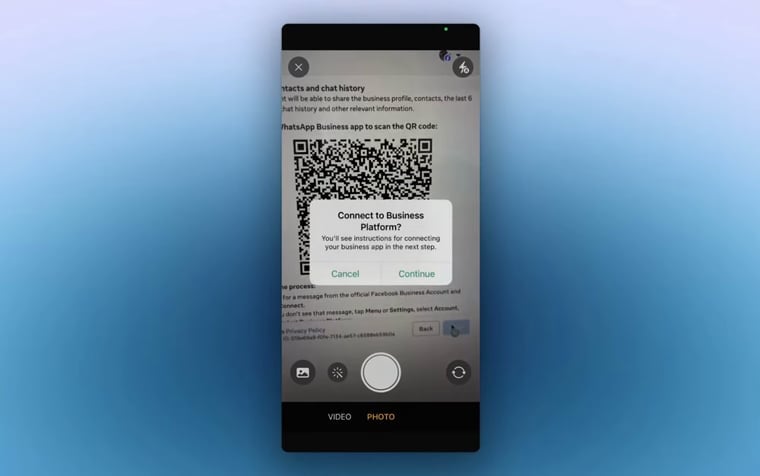
7
Connect to the Business Platform
On your phone, tap Connect to the Business Platform in the WhatsApp Business App.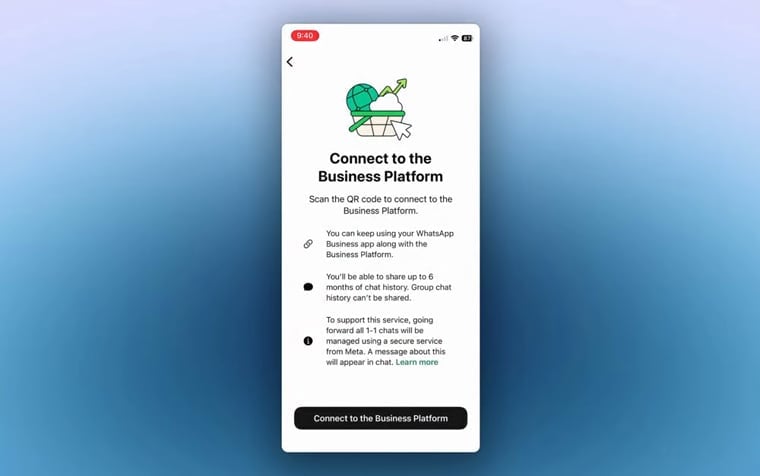
8
Scan the QR code
Use the WhatsApp Business App camera to scan the QR code shown by Meta.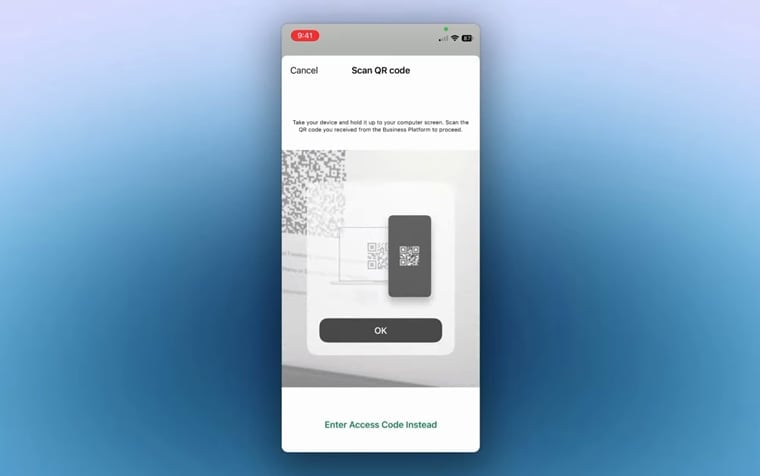
9
Choose chat history
Choose whether to share chat history, then confirm your choice.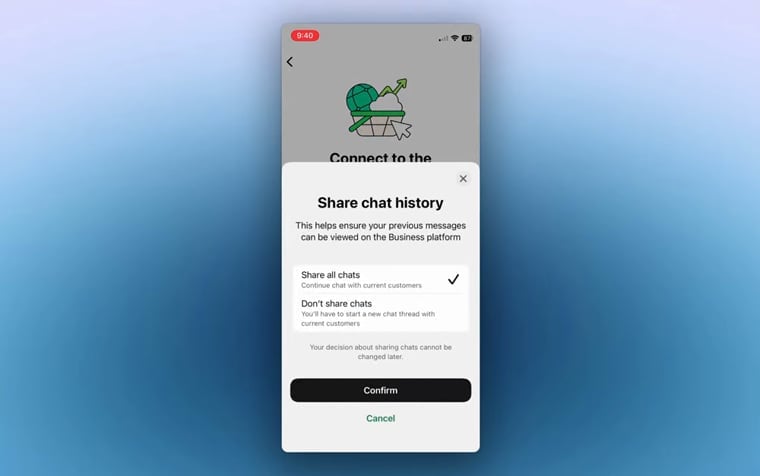
10
Confirm the account
Back in Meta, confirm the WhatsApp Business account name, select the Timezone, and click Next.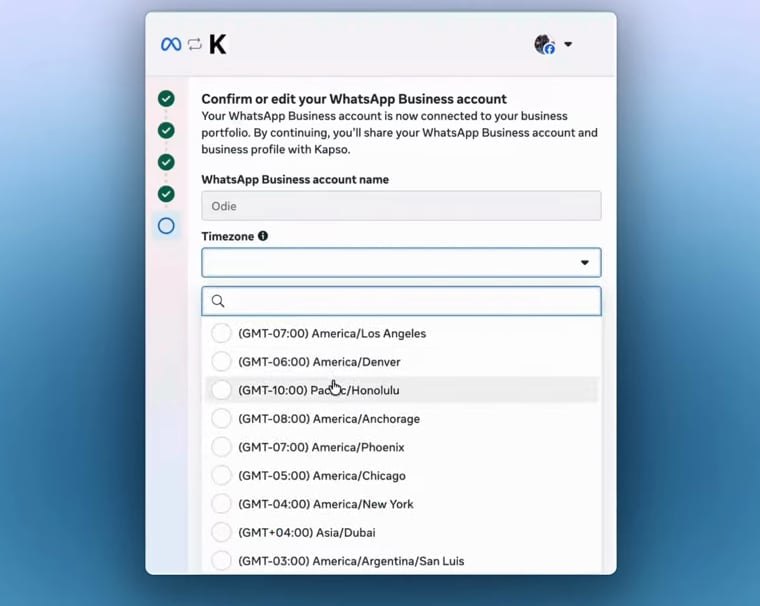
11
Review and confirm
Review the requested access and click Confirm.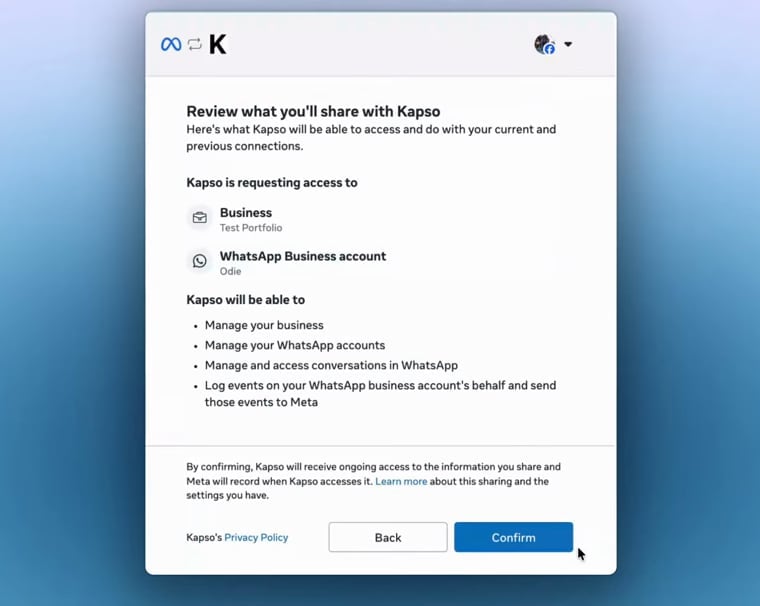
12
Finish
When Meta shows Your account is connected, click Finish to return to Nexor.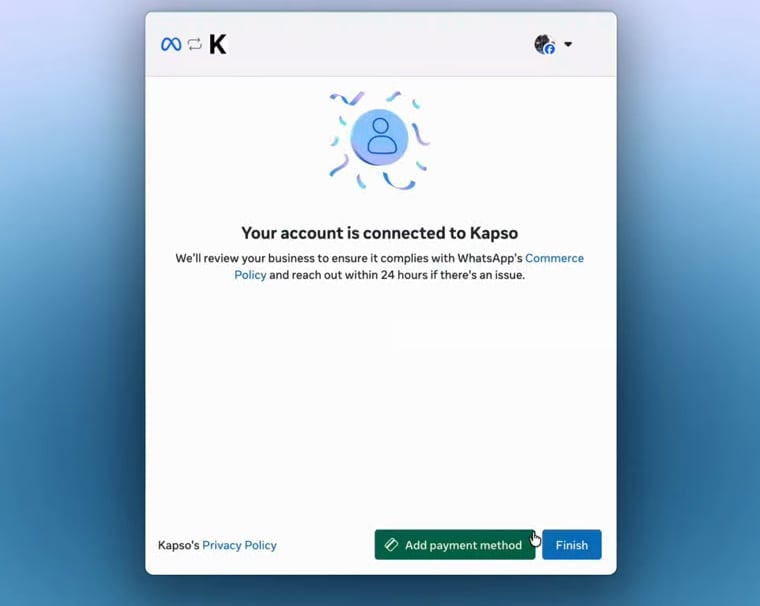
One number per agent
A WhatsApp number is used by one agent at a time, and every task of that agent can use it. In a task’s Channels you can turn WhatsApp off for that task or change how the task uses it. If you assign a number that another agent is using, Nexor asks you to confirm the move: the first agent stops using it, and only the new agent answers on it.After you connect
- When you connect from an agent, Nexor shows WhatsApp is connected: the number is ready for that agent. A number connected from Integrations still needs to be assigned to an agent with Assign in the agent’s Channels.
- Create your message templates: WhatsApp only lets the agent start a conversation with an approved template. Nexor also generates starter templates in the background; review them before they go out. See Message templates.
- If you started and didn’t finish, the number shows Setup incomplete. Choose Resume setup to pick your number and complete the setup.
If the popup doesn’t load
Disable ad blockers and privacy extensions, since they block Meta’s SDK. Try Chrome or Firefox if Safari isn’t working.Next steps
Message templates
Create and submit the templates you need to start conversations and re-engage leads.
Troubleshooting
Resolve pending reviews, verification failures, and numbers that won’t connect.
This guide is adapted from the Kapso documentation. Nexor uses Kapso as its WhatsApp infrastructure provider — credit and thanks to the Kapso team.